Using the squash and stretch tutorial, I implanted a mini rig into this cone and applied the squash and stretch. This was an experiment to see what else can help me with the movement of the jello. This worked out quite nicely and will be used in parts of the animation for when the ball jumps onto or off of something.

Wednesday, 4 December 2013
Tuesday, 3 December 2013
The Beginning Build
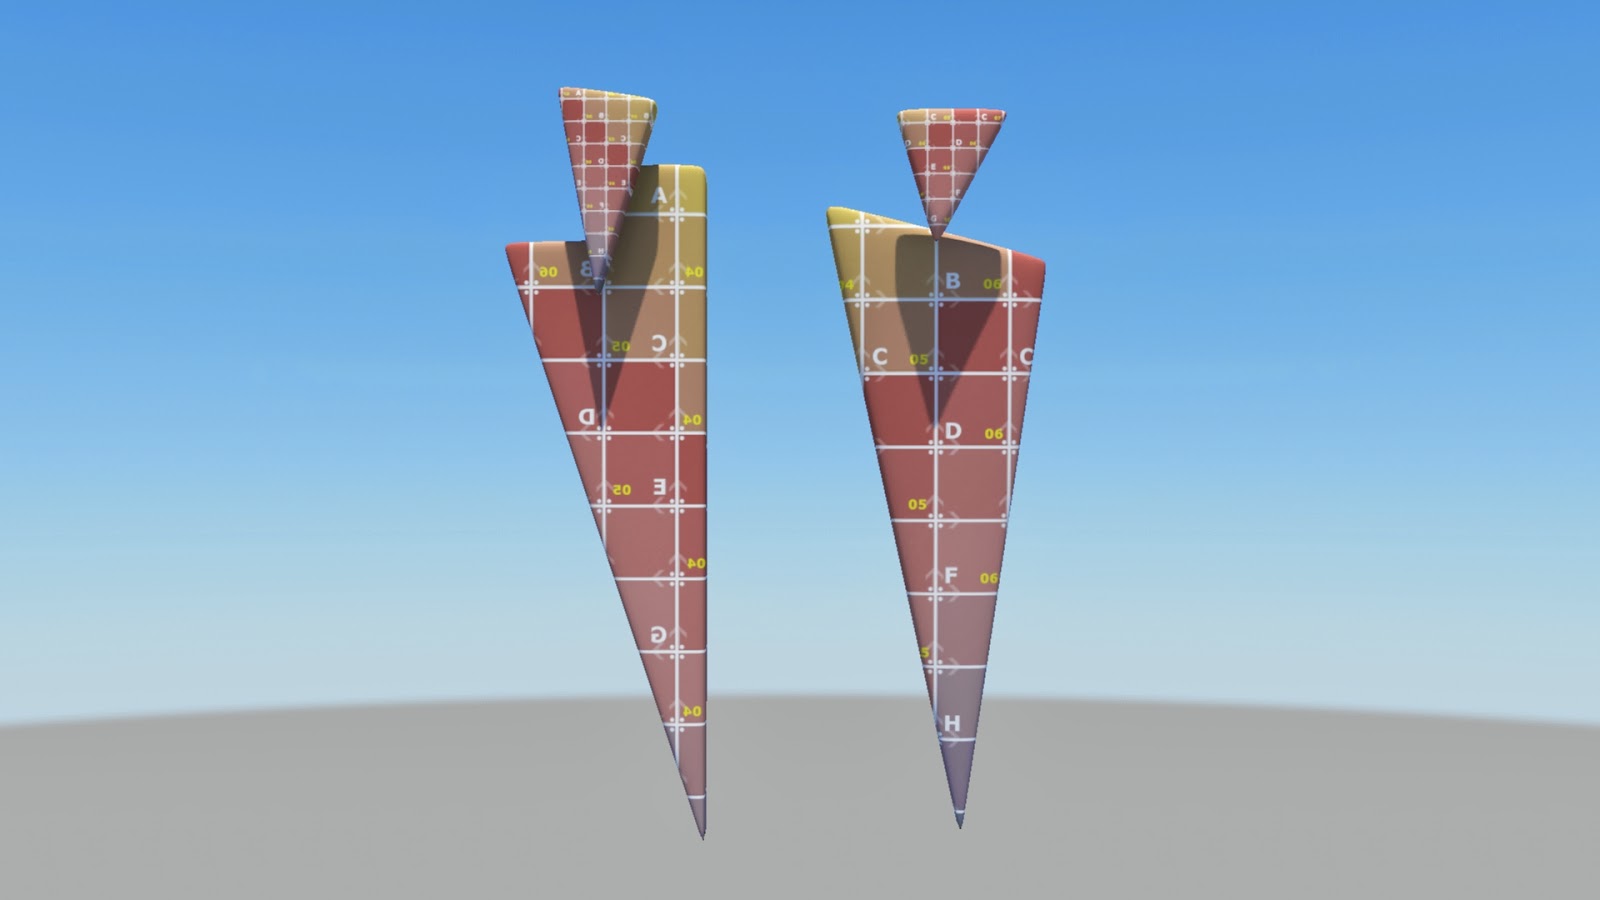
Here I am beginning to keep track of the processes involved with making my abstract set starting with the two main senter triangular pieces.

So far the textures is looking a little glass like due to the somewhat solid colour rather than the misty colour to get the jello feel. However its feeling a lot better than the first lot of outcomes. A little more work into the texture, making it feel more misty and it should be there.
The Process
1

I start off with the basic shape and begin to build it up following the out line. I then place a UV texture map so I can make sure the textures would fit onto the object nicely.
Both objects UVed
2

Here I placed a template texture (shown below) onto the objects to start to mold them into the jello texture. However, it became quite flat and solid.

3

Making the texture more lighter I had hoped to allow the texture to jellify but with no success. It still had no shine or transparency.

4

As the jello texture is quite temperamental and does not work if the object is to thin or too thick I experimented with changing the thickness of the object. The outcome was not according to plan. It became light or dark (which ever way i went) but still had no highlights or transparency.
5

I looked back to the Jello test from before and looked at the way I had modeled the objects. The old jello texture which did work, I found to be a lot more rounded unlike the sharpness the objects have.
6

I put a block colour onto the objects while making the objects more rounded and softer to see if this change works. To start with it had no effect.
7

I then applied an older jello texture onto the objects with a good out come. I then looked into the textures to see the difference to understand why it had not worked before with the other textures. It came to my attention that one setting was different from the rest: The Phong_Coefficient setting was set to 200 while the others were set to 0.
8

Changing these setting and applying new textures it came out a little hard still but with the highlights and semi transparency (in places).


Monday, 2 December 2013
Mini Map
While trying to work out playable ball and what kind of texture it should have (soft or hard) one of my tests popped out at me. Although it was not really suited for the ball, I did however feel it could possibly be reused for the small mini map.

(from the ball test)

I have not done much to it as I wish to keep it simple. The middle is the jello texture and should show some of the map behind it. It is surrounded by a hard textured toris with a small hard ball and pointer within. The pointer points to the objective the player must head to.
An quick example of how it moves.
Saturday, 30 November 2013
Ball Texture Tests
The last big question to be answered about my project is the character or better yet, the texture of the character. I attempted to build the playable ball from the jello texture to which the world shall be built. This however was not very successful. I did like the middle top (the black with the white ball inside) and the one to its right but bar that I think that jello on jello, it would fail to stand out.


I then began to look at hard object such as (in order right to left) Matte_Finish, Rubber, 50% Rubber/50% Matte, Matte_Plastic and Pearl texture. I quite like these hard textures so I put the jello in the background to really grasp if it would go together. I quite like the matte and rubber (the first two on the left) as they, to me, stand out but fit nicely.


Friday, 29 November 2013
Museum Presentation
Im looking at these museum presentations of Kandinsky's work for influence and reference of level select of my game. I started off simply looking at the kinds of frames his work has been placed and then moved on to the way his work is shown within the museums.


Wiggle Test 2 -Cone-
Here is another wiggle test with the jello texture. This time, going on a comment from Phil asking if it would be more difficult using a cone for example, I decided to test this question out. I made this the same way I did the first, using the lattice tool. It was relatively the same difficulty as the first also and worked out rather well.
Thursday, 28 November 2013
Wiggle Test
Using the lattice tool on my jello object a have made a small test to remind my self on the lattice tool. I cant say its the best jello wiggle however, It gave me some good experience on how to work it once more, and how effective it can be.
Animatic Update
This animatic update is very much like the animatic before. However, It now has the sounds placed and tweaked to fit. I have also added some small extra bits such as finger swiping and a place holder for the mini map and health system. (i.e when you get damaged, one of the balls next to the mini map disappears, representing a loss in life) There are a couple things still missing such as the little object you pick up as you go to get a score but is now (for me at least) a lot more hole.
Tuesday, 26 November 2013
Expanding & Exploring - Power Ups - Mini Map ETC
1
Exploring the design of the character and power up.

2
Exploring how the power up can be used in play.

3

4
Exploring the mini map and where it can be placed. Also looking at the character design and how the objects inside could be the items you pick up.

5
Combining these ideas into a mini storyboard.
Sunday, 24 November 2013
Jello Texture Tests Part 2

Once more exploring the jello, however, this time importing the colour textures from photoshop rather than the block texture from maya. Here is the final outcome I have made. I had a few little mistakes or things I forgot to do along the way but I think it is rather successful.
The Steps
Test_01
A simple block out in photoshop the multi colours. Out come is a little dark.


Test_02
I lightened up the texture with little effect to the object.


Test_03
Made it even lighter with little effect.

Applied texture to Mib_Volume. Made it a lot lighter but also flat.

Changed Mib_Volume to white with grate effect. Made it a lot light without it going flat (had forgotten about Mib_Volume before hand).


Test_04
Here I began to blur the texture in photoshop. It had a nice effect as it was no longer solid block colours and also faded into one another.

Narrowing the object in maya to explore the effect it would have. It made it lighter but I ended up changing it back as it felt to light.

Just like the red test before, I copied and pasted the object and made it smaller inside. I quite like this as it gives volume and a nice effect.


Small New Ideas On Game Play
Im trying to use what I already have with the game play while also trying to add some new ideas to it so its not so straight forward. I have taken into account a few things from the interim a few weeks back now to come up with a new plan. For example :- jello (the texture Im trying to create) and how that could effect game play (bouncing, getting stuck etc) :- Power ups (a possible way to get past the jello) :- and finally the fact this is a game for a smart phone or tablet thus the idea of interaction (not simply tilting the screen).

1
I have taken 3 scenarios from my animatic to explore how I could add another layer of integration and play.
The top half of image 1 is a take on (near the start of the animatic) a wall of jello. In the animatic it has no input as you simply roll past it. However, I was thinking, if its jello, how do you get past? Maybe going taking a run up for extra speed to get past or maybe flick the ball to change its shape. For example, making it squash so its more bullet shape thus can penetrate the jello for a short time.
The bottom half is of bouncing. I quite like the idea of the player having to flick or drag the ball or what ever it stands on to get a bounce, The longer you hold the high you go, but if you go to high you can the get stuck on the way down (as shown on the bottom of image 1).

2
Here I was thinking of a few things, some of which again came from the interim.
The top half is having a quick look at maybe a new health system (rather than in the ball, its on the top of the screen (old school style) so you can see you 3 health points) and a mini map so you can see your location to the objects you need to gather and its placement.
On the bottom is looking a power up system continuing from image 1. Very much like how I wanted to show the health system, to show its power up or power down (when it has no power up) the little ball inside will fill up. Another thing I was thinking of was on using the little specs of colour within the painting (which at this moment I have not used) as a way of to obtain the power up bar thus the playing being able to flick the ball to get past the jello for an example.
Friday, 22 November 2013
Jello Texture Tests
To create these I have used and experimented with Dielectric_Material and Volumetric_Materials.
These are far more successful and more jello than my texture tests from before as they have a level of transparency the others did not.

Comparison between the new and old texture tests.


Subscribe to:
Posts (Atom)