Wednesday, 11 December 2013

Build Process

Here is the main part of the set being built, taking reference from both the paint, Merry Structure, and my own animetic.


Process

Blocking Out


Refining  & Placing
(WireFrame)

Refining  & Placing

Bevel Crazy

This is to create a soft edge as most of the objects shall be made from jello.

Placement In Frame


Monday, 9 December 2013

Mini Map Shot Test


Here I am now applying the mini maps which I believed would work the best to this mock up shot to narrow down which mini map and set of colours fit the best with the world.

I quite like 1although the blue Is horrid, a possible mixture of 2 & 3 with the shape of 5 and 6.I do like the fins from the rest but they seem to pointlessly take up room and does not quite seem to fit with the rest of the shot.


1

Here it is a little higher than the rest. This is due to me wanting to know, if i decided to stick with the ball in the centre, how much room there is and how big the mini map could be to fit in. 

I am not a fan of the light blue as I do not think it matches with the world. I do however like the black and yellow.


2

I am a fan of the earthly colours as they do match and fit in with the world.


3


4


5

The green is horrid and is quite alien to the world. I do however like the light orange/brown colour of the ring.


6

I was unsure if the darker colour would go with the world. The colour seem a little alien to the rest of the shot but there is something that draws me to this one. It does however, stands out from everything else (maybe a little to much)  and I am quite fond of the shape, rather than the fins on the others.


Test Shot (Render Time + Black Texture)


While wiping up a quick shot to answer some questions such as where and how large the mini map can be, I ended up experimenting with the black ground texture. This was primarily to see what looked right with the world but also a small concern over render time. When I first started the rendering it surprised me that it was almost taking 3 minuets (rather than the one to two minuets at uni) to render even though the is very little in this shot. While hunting for a texture I kept note of the render times. In the end I believe the render times are longer due to it being from my lap top rather than the computers at uni which seem to go faster. Something I will have to check later on.

2.56
(render time)
Jello Texture

This one sparks my interest the most. It reflectiveness and shine which shows the colour of the backdrop gives it a nice feel. However I am not sure on the ground it self as I am not sure if the ball sits nicely on top, or if it stands out to much.

2.19
(render time)
Blinn


2.18
(render time)
Blinn

I am not so keen on this one as to me its to flat for the world.

2.25
(render time)
Mat_X

I applied the same rubber texture of the ball to the ground and spikes which I like to some degree. Its a little grey and can still be made blacker but I do like the solidness of the texture. 

Lowered

Here I simply lowered the ground to give a little more head room as i left with the others it was a little to high.

Black

Here I have blacked out the rubber texture and it looks very similar to the Blinn. I quite like the darkness compared to the lighter texture above.


Mini Map With Painting


Here I am trying to take the guess work out of the mini map design by placing it next the painting. This is in order to see what colour match and complement and which ones are a little alien and not from the world I am trying to create.

Lot 1


Lot 2


Lot 3


Lot 4


Thursday, 5 December 2013

The Maze

Here Im looking at the maze and how I can improve and add a challenge to it. In the beginning I tried to apply some of the challenges from the rest of the game level such as jumping and dangerous objects.


These images are a little confusing so I have tried to sharpen then up a little to explain how it could work.

1

2

Using the 3 images from image 2 I have game over and blocked the maze out. The foundation of these mazes are ; The walls are made of jello; The Red circles and arrows represent dangers objects and there movement path; the hash symbol represents a tele teleporter  (how you get out of the maze at the end); the green > is the objective to which you need to obtain.

The final part of this foundation is the most key and that is how you move about. Like the rest of the game you tilt to move but with an added aspect. it is very much up down left and right (maze is static) but this can be shifted when the ball follows a curve. This can change the way you move. So what was once down is now right or left. However this change can only happen on a curve and not a sharp and straight edge.

3


I have added a light blue line just to show the correct path to take.

4


Mini Map Update 2


I have selected another design which is similar to before but with a little bit more shape. I have explored some more colour rangers trying to stick with earthly and soft colours. 


I quite like this shape for the mini map as it feels more game like.  From lot 1 i like 2,3 and 5. 2 as its soft and i feel would sit nicely with the game, 3 as it would stand out a little more and 5 for these reasons also.

Lot 1


From lot 2 i like 2,3 and 6 as i like the dark and light colours together and also the earthly colours.

Lot 2


Mini Map Colour Update

From the seleftion I did before, I tried to add some basic colouring to show the health and power bar. This was a quick way to see which ones would work the bets.

Base


From these I picked the first one to explore in more colour. In this first lot I tried some softer and harder to get a vision range of colour. I believe the ones that work the best are 1 and 4.

Lot 1


Going from the light and soft colours I continued down this route to explore this a little more. Having to much softness makes it kind of blurry and hard to see (like no 5) but a mix of hard and soft worked quite nicely. From this lot I like no 1 and 3 as i feel the hard and soft complement each other.

Lot 2


Squash And Stretch Mark 2


Now with extra volume!

Wednesday, 4 December 2013

Mini Map Selection


Here I have taken some of the mini map thumbnails from before and blocked them out to see what they look like. I have experimented with combining a few together also. I like 1, 4 and 5 due to there shape being rather interesting.

Mini Map Explorations


Here Im looking at another way the mini map could work. Rather than an arrow directing you the mini map acts like a sonar. When the object comes into a certain distance it appears as a dot on the mini map.  The player is the still dot in the middle while the objective is the dot getting closer.


Looking to explore the mini map I have come up with a few new designs. 


With these I have tried applieing the health bar to the mini map. The health bar are the shapes surrounding the mini map. I quite like no 7 from this selection.


These have two bars. The circles are the health while the others are the power up bar. I am trying to find a way to condense these bars into one so to take as little of the screen as possible. From these I like no 18 as it feels quite nice and fits my wound with its softness.

Squash & Stretch Test


Using the squash and stretch tutorial, I implanted a mini rig into this cone and applied the squash and stretch. This was an experiment to see what else can help me with the movement of the jello. This worked out quite nicely and will be used in parts of the animation for when the ball jumps onto or off of something.

Tuesday, 3 December 2013

The Beginning Build

Here I am beginning to keep track of the processes involved with making my abstract set starting with the two main senter triangular pieces. 


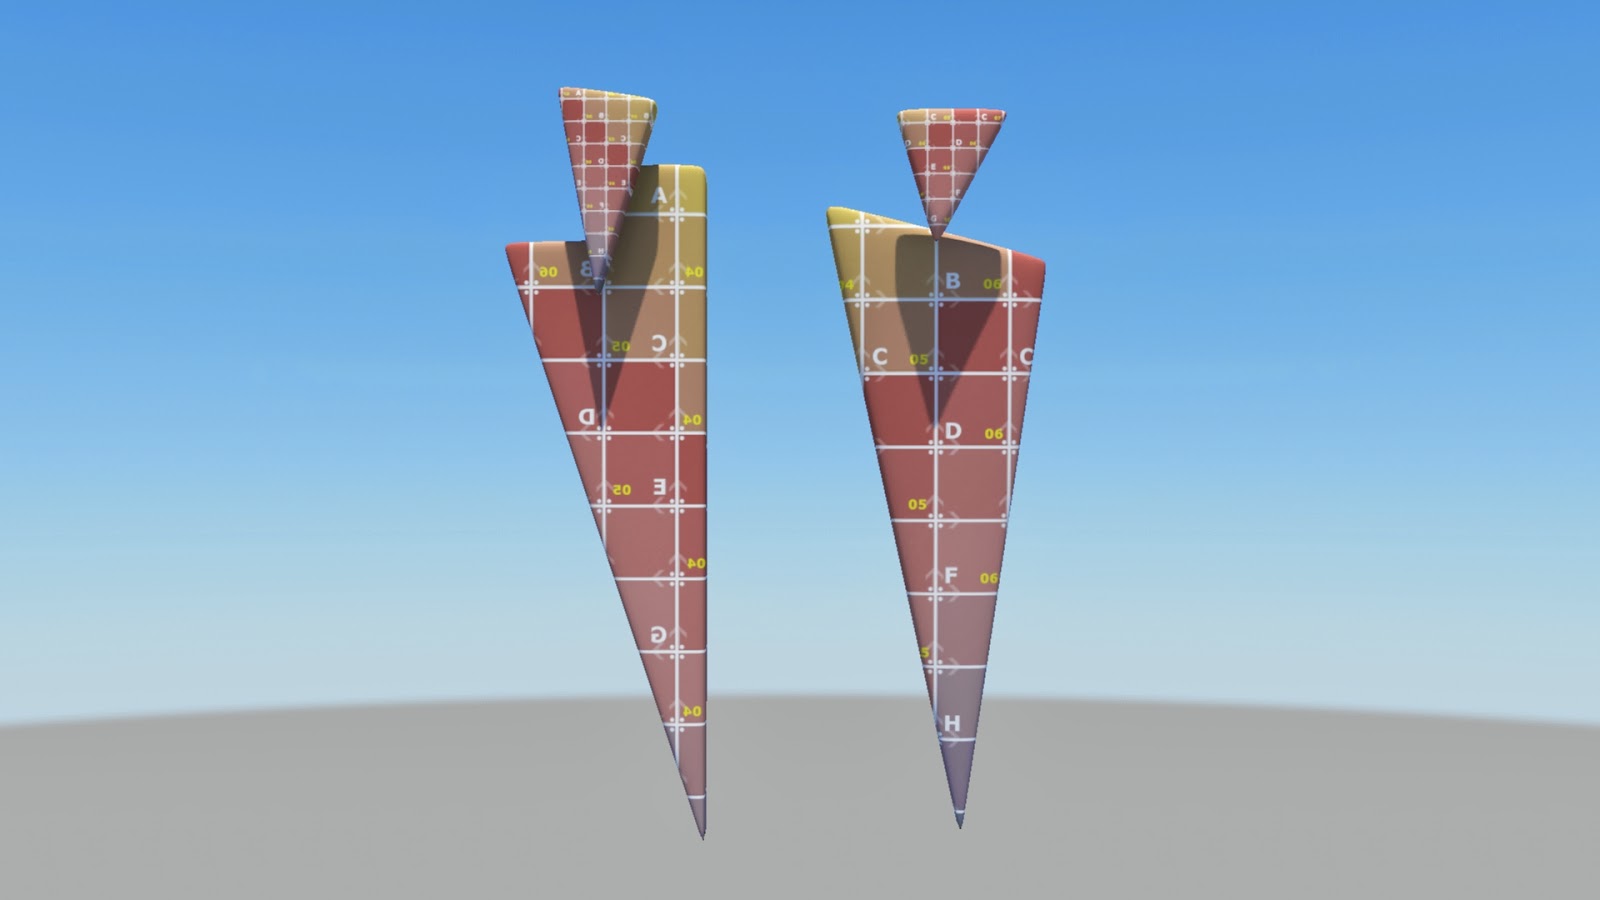
So far the textures is looking a little glass like due to the somewhat solid colour rather than the misty colour to get the jello feel. However its feeling a lot better than the first lot of outcomes. A little more work into the texture, making it feel more misty and it should be there.


 The Process 

1

I start off with the basic shape and begin to build it up following the out line. I then place a UV texture map so I can make sure the textures would fit onto the object nicely.


Both objects UVed

2

Here I placed a template texture (shown below) onto the objects to start to mold them into the jello texture. However, it became quite flat and solid.


3

Making the texture more lighter I had hoped to allow the texture to jellify but with no success. It still had no shine or transparency.


4
As the jello texture is quite temperamental and does not work if the object is to thin or too thick I experimented with changing the thickness of the object. The outcome was not according to plan. It became light or dark (which ever way i went) but still had no highlights or transparency.

5
I looked back to the Jello test from before and looked at the way I had modeled the objects. The old jello texture which did work, I found to be a lot more rounded unlike the sharpness the objects have.

6
I put a block colour onto the objects while making the objects more rounded and softer to see if this change works. To start with it had no effect.

7
I then applied an older jello texture onto the objects with a good out come. I then looked into the textures to see the difference to understand why it had not worked before with the other textures. It came to my attention that one setting was different from the rest: The Phong_Coefficient setting was set to 200 while the others were set to 0.

8

Changing these setting and applying new textures it came out a little hard still but with the highlights and semi transparency (in places). 


Monday, 2 December 2013

Mini Map


While trying to work out playable ball and what kind of texture it should have (soft or hard) one of my tests popped out at me. Although it was not really suited for the ball, I did however feel it could possibly be reused for the small mini map.

(from the ball test)


I have not done much to it as I wish to keep it simple. The middle is the jello texture and should show some of the map behind it. It is surrounded by a hard textured toris with a small hard ball and pointer within. The pointer points to the objective the player must head to.


An quick example of how it moves.